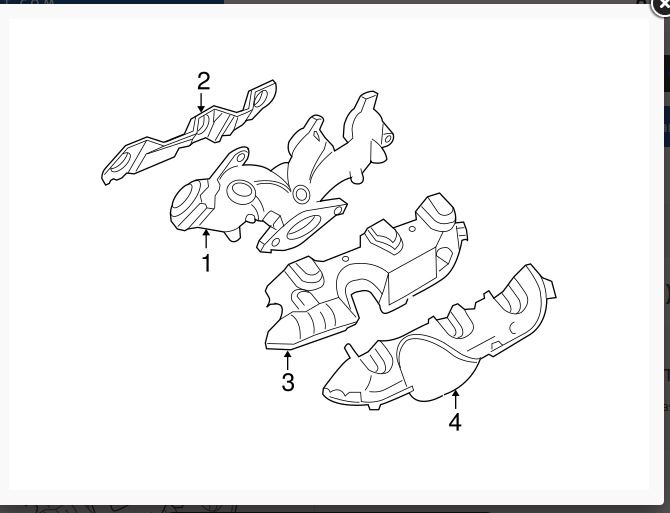
i am removing firewall head on my equinox. there are 2 rusty bolts/studs that hold the flange for the downpipe. which i sort of need to reach from under the suv. i person i know says they unbolted the exhaust manifold from head and did not have to deal with rusty studs. seems to me even reaching the bottom manifold studs is much harder than trying to just unbolt these 2 studs?
If you can reach them, maybe with an extension, and use a breaker bar, you can do it. A few soaks with PB Blaster and some hammering on the area, maybe even an overnight soak, always work for me. Good luck and let us know how it goes.
the upper heat shield was just laying on top of manifold as the flange area was rusted away. the heat shield bolts to the manifold and is not held in place by the manifold bolts. there is an upper and lower heat shield. at least i dont have an AWD driveshaft output hub in the way. the trans tunnel area is somewhat roomy. ya i can unbolt the head just fine. its the head/exh connection that is the issue
Does the service data suggest which order to use? If you post the year and engine configuration I’ll look what I can find about the procedure to remove the firewall exhaust manifold. .
05 equinox 3.4. I got the 2 bolts off. Noticed 1 of the 3 flange bolts for crossover pipe is broke off. So head can be unbolted from block now. I see dorman sells a manifold kit with heat shields for $600. Seems it is hard to find heat shields alone as they are gm discontinued.
Different instructions for the right vs left manifold. I’m guessing the one closest to the firewall is the “right” side.
Frpom what I’m seeing, this is the suggested order for right-side exhaust manifold removal
crossover pipe nuts (3), cat nuts (3), 3 heat shield bolts and both heat shields, exhaust manifold nuts (3), exhaust manifold, and studs (if necessary)
Looks like 1 cyl has issue. I wonder if the 3 bolt flange for crossover will be a problem? 1 bolt is rusted thru. And the other 2 look pretty bad.
Great photos there OP. Interesting. Yeah, the top cylinder looks steam cleaned, maybe a coolant leak. The gasket circle isn’t very round compared to the other two, that’s for sure. You know now you didn’t waste your time removing the head, so that’s good news. Glad those 3 stubborn looking flange bolts didn’t cause you too much grief. Working on an engine with room galore as it lies on the grass rather than in a cramped engine compartment seems like the way to go.
When I moved into my current neighborhood here in San Jose I could have had all the rusted automobile engines I wanted. Many of the neighboring properties were rentals and folks apparently had removed the engine from their cars, decide it couldn’t be fixed, and just leave it in the front yard, hope the weeds would hide it somewhat. In those days I didn’t have time to think about rusted engines. All those engines are now gone due to the area’s gentrification. I wish I had saved a couple of them to experiment with.
One time the landlord of one of those engine-in-the-weed properties decided it was time to mow the weeds. Bam!! Mower parts flew everywhere. Boy was he upset!! Rusted engine didn’t get much damage though.
Wish I could find some heat shields. the crossover studs have the hex. They unbolt just fine. The 2 bolt down pipe studs do not have the hex. Pic #1 shows that. Yes the inside of valve covers are coated with mud. Heads seem to clean up ok.
1 good stud out of 6. Maybe I could make a large sheet metal washer to hold the heat shields in place? Would be nice to tack weld some small patches over the bolt holes
Just like new 
the front heatshield wraps around the manifold. i dont think the rear shield is the same. maybe only on the top of the manifold? the coil pack sits on a metal bracket directly on top of the manifold area. it really gets hot i figure. i need to find a shield in better shape
Congrats! Thanks for taking the time to post the interesting photos along the way.


