Dent/paint/scratch removal by self, possible?

Hi,

I have Acura RDX 2015 model. Since sometime, there are scratches at two places. Earlier this year I took it to a body shop, who gave me quote of $1800, so I never thought of fixing it.

Other day I was reading about “DIY Touch-Up”. Can someone advice me, if it can be done by self ? I am not expecting it to be showroom quality, but want it to less visible than it is now. Please see both pictures on this link → Acura RDX 2015 dents - Album on Imgur

Any suggestions please ?

Thanks

haha.. Yes, corrected now :slight_smile:

It’s a ten-year-old vehicle. Don’t waste your time and money on such minor imperfections such as these.

Save the money for when the vehicle needs mechanical repairs down the road, and get the most out of it.

Tester

1 Like

I agree, that’s why I skipped to get it done on body shop. But recently I was reading about DIY in like $150 or so, that made be curious again :slight_smile:

I have yet to see any person who has never performed body repair end up with an end result that looked better than if they would have the left the damage alone.

They just don’t have the know-how and more important, the proper tools.

Tester

Understood. I thought so, it would not be as easy as it states on chatgpt :slight_smile:

Chatgpt is not that smart.

You could buy a small bottle of matching touchup paint and cover the dark portion and maybe the scratches for maybe $20. It will still be very visible but maybe not so noticable.

It’s called 50/50 damage.

It can’t be seen if you’re driving 50 MPH, or if you’re standing feet away.

Tester

“The 2015 Acura RDX Silver Moon Metallic color code is NH700M”, this is I found for color.

Should this work ? - 2008-2017 Acura Touch-Up Paint - Silver Moon 08703-NH700MAA-A1 | OEM Parts Online

Other option, I am reading is this - Color

Go with the brush-on touchup paint. A novice using Duplicolor spray paint will make it look worse than it does now.

Bodywork and paint repair is a practiced skill which is why the repair cost is $1800. First-timers will mess it up. 2nd timers will mess it up…as will 3rd and 4th timers. Maybe by the 5th time you won’t be embarrassed by the result but it will still be noticeable.

Ask body shop why repainting a fender for $1100 is better then a $20 bottle of elixir? You’d think shop would have a case of the magic stuff?

Yup!
Many years ago, a neighbor employed an itinerant “body repair” guy who was going door-to-door. (Because you always get the most expert repairs from people who solicit business in that way :smirking_face:)

He sat on the curb for a couple of hours, smoothing-out a few dents in her aged Volvo, and then hitting those areas with a spray can. Initially, it looked really lousy if you got closer than 50 feet, but within a few months it looked even worse from further away.

1 Like

Respectfully, those are not scratches. IMO, the damage is too wide for brush on to look any good. Mustangman hit the nail on the head regarding experience you gain from attempting these kind of paint/bodywork repairs. It’s not unlike laying sheet vinyl (lineoleum). Any imperfection will be projected through the layers over it. Given the situation and your inexperience I would suggest the following approach that has worked for me.

First, clean the entire area with a solvent that will dissolve any residual wax. Medical grade isopropyl will work.

Next, apply a thick wax, paste wax is good, in a thicker coating around the defective area where you don’t want the paint flashing to stick. Take your time and get as close to the defects as you can.

Use a rattle can of the touch up paint to apply very thin coats and build up the repair. Allow it to dry between coats which should be quick if you keep it thin. If you apply too heavy it will run. Keep the can back from the work and keep moving it back and forth as you spray. Better to start further away than too close and move in as you see how much paint is going on the surface.

Apply a couple of coats of clear paint over the color coats.

Wash the area to remove the wax and flash once the paint has fully dried.

If the “patch” is too different in gloss, you can follow up with a light polishing compound to improve the clear coat finish. Just go very light so you don’t work through it.

You really can’t make it worse and it’ll be good experience to try.

I also tape a paper or plastic barrier around that area to allow for the broad strokes needed for thin, even application of spray paint.

I’ve done some stuff like this over the years with some degree of success. No - an inexperienced person with a rattle can isn’t going to create invisible and perfectly blended repairs. And I never have. But if you’re careful & conscientious about it, you might be able to make yourself happy for just a few bucks and some time/effort.

I say to keep watching the DIY videos, and then give it a whirl. Just be conservative about it all to start off. It’s already ugly, so if it stays ugly, no big deal. But you don’t want to end up at MORE ugly.

BTW, there’s at least one auto parts store near me who has a machine to mix up a rattle can on the spot to your paint code. That might be a handy thing to look around for.

@TwinTurbo , thanks for additional tips. I am trying to absorb your suggestion and here is what I understood, step by step. Please correct me, if I am missing something and options I could find →

1- 91% isopropyl alcohol to remove wax, oils, and residue from both affected area (on metal as well on plastic part)

2- Apply thick wax around damaged area (Options - Meguiar’s M26 Hi-Tech Yellow Wax Paste or Collinite No. 476s Super DoubleCoat Auto Wax ???)

3- Get Spray paint. Option →
Alabaster Silver Metallic, NH-700M from TouchUpDirect. If I choose that, it has below options -
Aaerosol essential Kit - Includes Aerosol Colorcoat and Aerosol Clearcoat
Aerosol preferred Kit - Includes Aerosol Colorcoat, Aerosol Clearcoat, Aerosol Primer and Wax & grease remover wipe.
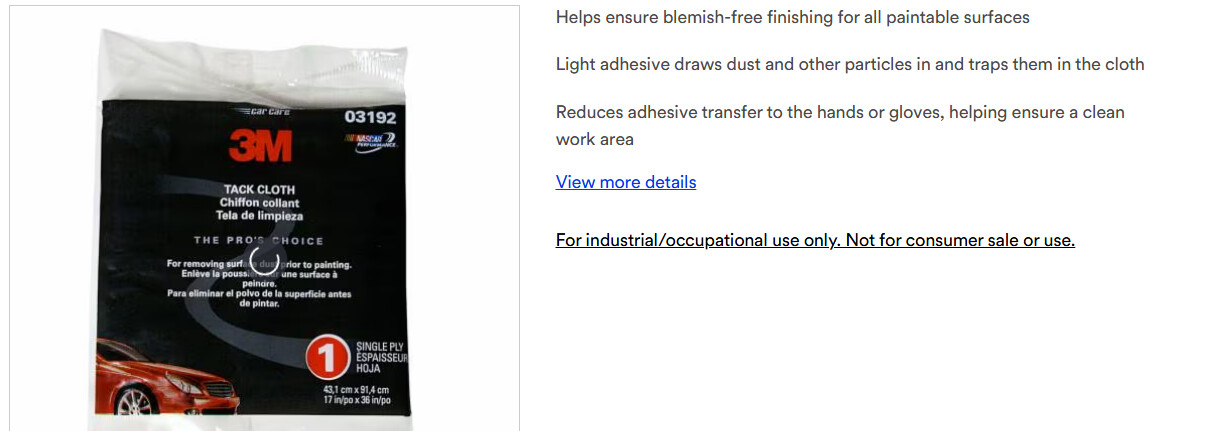
Aerosol platinum Kit - Includes Aerosol Colorcoat, Aerosol Clearcoat, Aerosol Primer, Wax & grease remover wipe, Tack cloth
Assorted sand paper pack, Polishing compound and Masking tape

Should I choose “Aerosol platinum Kit”, as it has everything I would need ? If so, then next step -

4- Use the wax/grease remover wipe and tack cloth to clean the area.

5- Primer: Apply if scratches reached bare metal. Let it dry.

6- Color: Spray NH‑700M in thin, even coats.

7- Clear: Spray clear coat after color fully dries.

8- Finish: Wet-sand lightly with the included paper to smooth any texture and Polish with the included compound to match surrounding gloss.

I wouldn’t use tack cloth as it can leave residue behind. My final wipedown would likely be a microfiber rag with rubbing alcohol. That would be after some light sanding of any areas that will get touch up paint.

If you want to do a little extra work to diminish the depth of the scratches, this stuff is pretty quick and easy to use: Bondo® Glazing & Spot Putty | 3M United States So, basically, clean everything. Do the spot putty. Sand and clean again. And hit it.

Instead of beating your brains out asking questions you might be better served putting ( dent and scratch repair videos on youtube ) in your search engine. There are hundreds of them that will let you see just how some people do it.

1 Like

Use of a tack cloth is common prep prior to painting.
Your link shows this tack cloth:

Where do you suppose he obtained the information he posted?
And why not have a discussion here about painting, he is already engaged in conversation with 8 painters, although at least one is a clown.


.

Thanks all.
I am collecting information about steps, as well as product I should use, as there are various options. All the information provided so far is really helpful and I am watching videos too, to learn more.
So far, it looks like I am buying –
TouchUpDirect Aerosol Platinum Kit – Color: NH700M (Alabaster Silver Metallic)
Bondo Glazing & Spot Putty (small tube, 4.5 oz)
Isopropyl Alcohol (for initial and final cleaning) = 91% or 99% Isopropyl Alcohol – small bottle
Collinite 476s Super DoubleCoat Auto Wax
Tack cloth